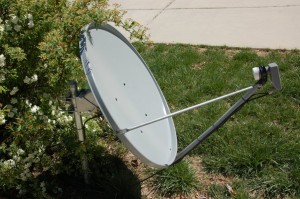
Longtime MT.Net readers will know that I’m a satellite geek. I bought a DVB-S card for my computer five years ago and enjoyed tuning in the few channels I could pull in on a tiny 18″ dish. That didn’t hold my interest, though, because … well, there wasn’t much to see.
For my latest birthday, I decided to get a little more serious into this hobby. I found a Craigslist ad from a local guy who was selling his satellite gear. For about $75, I bought three DVB receivers, a dish, and an LNB. I took the parts home, scratched my head, and wondered if I had the knowledge to put it all together into something that worked. It turns out I did!
For my previous forays into the free-to-air satellite world I’d been content to simply jam a pole into the ground and aim the dish attached to it by hand. This seemed to work for the DBS satellites that were designed to beam signals to the 18″ dishes. However, it did not work for the various other satellites that provided programming. These satellites require a bigger dish to properly receive their signals: a 30″ dish to be exact. And with more satellites to check, aiming suddenly became an issue.
I had a few more purchases before I was ready to hook it all up.
First I needed a satellite motor mount to point my dish to more than one satellite. I also needed a bag of concrete and a bag of pebbles. I already had a 2″ wide aluminum fence pole that was sized perfectly for a dish, so I used a four foot section of that. Now, with all the parts I was ready for the real challenge: setting up the dish.
Because satellites orbit the earth in a large arc along the Equator, properly installing your dish is crucial. You’re aiming for a minivan-sized satellite hanging in space …. 22,300 miles away! Getting the dish properly positioned is the hardest part of this whole process.
The first step is to site your property for the best location. From my earlier work with satellites, I already had the perfect tool for this task: an inclinometer. This tool has a compass and an elevation indicator which will tell you what satellites you can see from a particular location. Initially, I wanted to put my dish unobtrusively somewhere in the backyard but the trees there made that impossible.
After checking angles from various spots in my yard, I settled on one in the front of my home on the strip of land between my home and my neighbor’s. The spot has a decent view of many satellites and clears the tops of the backyard trees. It is also partly shielded from the front by a bush, so it isn’t an eyesore. As a test, I jammed a pole into the ground, hung the dish (without the motor) on it, and after a bit of fiddling I managed to find a satellite! My whistle was whet: it was time to do the job right.
Before digging anywhere in my yard, I always make sure to call the “one-call” utility marking service. A guy shows up a day or two later and marks all the utility lines (phone, cable, electrical, gas, etc) so that things don’t fall down, go boom when I plant my shovel in the ground. This particular area had my phone line and my electrical line in it, but because the phone line was the only shallow one that was really all I had to worry about.
I considered creating the 70′ trench I needed all by myself until I found a contractor who was working in another part of the neighborhood. I paid him about a dollar a foot to plant multiple runs of coaxial cable from my home out to my dish location. He did a great job, too! He and his trencher finished in 30 minutes what would’ve taken me most of the day to complete. Money well spent!
My first attempt at cementing the pole in the ground failed when the concrete never hardened. This was due to some combination of the concrete being too old and the fact that I didn’t follow the proper mixing procedure. I scrapped that first attempt and tried again with a fresh bag.
The first step in putting in the pole is to dig a hole. I borrowed my neighbor’s post-hole digger and created a hole about 18″ deep. I filled the first inch or so with pebbles to help the water drain away from the pole. Then I mixed the concrete in a bucket and poured it into the hole.
As the concrete was setting, I braced the pole with wooden stakes and adjusted it to be as absolutely plumb as possible. This was delicate, time-consuming work but it is extremely important if you ever want to be able to tune multiple satellites. If you screw it up, pull it all out and start over, but be sure to get it right. IF your pole isn’t completely plumb nothing else will work.
After the pole had set and was plumb, it was on to the second most difficult task: aiming the dish. I’ll save that post for part two!
